Skip to content
An old saying in the printing world goes, “you can’t judge a book by its cover.” While this may be true, you can certainly judge a print job by its proof. So, we’ll show you how to do proofing before printing like a pro, so you can avoid costly mistakes and produce perfect prints every time.
What is Proofing before Printing, and Why is it Important?
Proofing is the process of checking a print job for errors before it is printed. This step is essential because it allows you to catch and fix any mistakes before they become expensive and time-consuming printing problems. You can be confident that your printed piece will be accurate and perfect by proofing your job.
If you’re not familiar with the proofing process, don’t worry. We will get on a journey with you through everything you need to know about press proof.
What are the Different Types of Print Proof?
There are several different types of proofing, but each has its own advantages and disadvantages. Therefore, it’s important to choose the right one for your project.
Dummy Proofing

A dummy is a stack of blank sheets of paper folded and numbered to test a book’s layout and page imposition before printing. An unprinted mock-up is also known as a dummy. It’s a fictitious blank sample that uses the same printing paper stock and binding procedure as the final product. The inside paper, binding method, cover surface lamination, cover paper, book thickness, and book size can all be checked with a dummy. It depicts how the finished product would seem and feel without the use of printing.
Soft Proofing or the Digital Print Proof

Soft proofing refers to examining an accurate representation of a digital file on a monitor before printing it. This online representation (soft proof) of the finished script can serve as a contract between the supplier and the buyer, replacing the usual hard copy proof. If properly installed and maintained, soft proofing systems can surpass traditional hard copy proofing workflows in terms of speed, distribution, economy, consistency, predictability, and efficiency. To ensure effective soft proofing, you can use tools like Kodak InCite, Ziflow, etc.
Plotter Proofing
Inkjet proofs, often known as plotter proofs, are an excellent low-cost choice. Content, layout, and pagination are all checked using inkjet proofs. You may double-check that everything is on the appropriate page and that the product flows as it should because inkjet proofs can be converted into booklets or brochures.
This type of printing proof can be trimmed or bound to show how the finished product will appear. However, not all faults will show up on a plotter, like color accuracy.
Color Proofing

As plotter proofs are low-resolution proofs, they aren’t used to match colors. Thus, we can color proof to adjust the colors before the final draft is printed. After comparing the colors on the screen, you can change the color that will be published until it closely matches the RGB color on the screen. Color proofing can help you prevent unpleasant surprises by simulating which colors will print well and which will be mapped differently.
Wet Proofing

Wet proofs are another sort of proofing. These are taken right from the press at the commencement of a production run. These proofs are thoroughly examined for clarity and color accuracy as part of the manufacturing process. Bleed, and crop marks are included on all proofs. Wet proofs are the only ones that are printed on the actual paper that will be used for the print run.
Which proofing is right for you?
Proofing before printing is a necessary step and its type solely depends on what you are checking for.
For example,
- Hi-Resolution proofs, also known as “Digital Proofs,” are the finest alternative for viewing color and design details.
- Press proofs are nearly identical to the final product, allowing for the most accurate color comparisons.
- Plotter proofs are less expensive than high-resolution proof, and they can be reduced to represent the final project.
How to Proof a Print Job Effectively?
Here’s an outline of the different ways of proofing before printing and how to do it effectively.
Have a checklist
The first step is to create a checklist of all the elements that need to be checked. This might include the layout, fonts, colors, images, and so on. Once you have your checklist, go through each item and ensure that everything is correct.

Go through all the details
The next step is to proofread the script or take another glance at the artwork. Keep an eye on the spellings and thoroughly check for all grammatical errors. You can also take the help of an online proofreader tool that would keep you at ease.
Print out the draft
When it comes to finalizing the print, ensure you are not shying away from printing out drafts. Take a hard copy, analyze what the final print would look like, and then edit the font, colors, size, spacing, etc, as needed.
Get a second opinion
It can be helpful to get someone else to proof your work. This is because they will likely catch things that you missed. Make sure to choose someone who is detail-oriented and has experience with proofing.
According to Allen Glazer, a large-volume print production expert, printing expenditures should account for 25-75 percent of a design project’s budget. If a mistake isn’t caught in prepress, it will be far more expensive to correct afterward.
So, What are the Steps You Can Follow While Proofing a Print?
Step 1 – Proofing for White Dummy
Size
The first thing you should keep a check on is the size of the dummy. Start by trimming the size of the book accordingly. You can measure the size of the text pages on the document and then compare it with the size of the book page and adjust accordingly. As far as book covers are concerned, printers usually have a standard of adding some extra bleed.
Materials
Research well about what material of both the pages of the book and the cover you would like to have.Next, ensure that the dummy material is consistent with what you desire to be that of the final book. As a personal tip, we recommend that you ask the printer to make two copies of the dummy, sign both copies, and send one signed dummy back to the printer. In case there are any discrepancies with the materials, there’s always a benchmark copy in hand. To learn more about how to choose the right materials for your books, click here for an article for more detailed recommendations.
Binding
After you finalize the binding of the book, make sure the way of binding (hardcover, softcover, Flexi bound, saddle-stitched, etc.), the shape of the spine (square back or round back), H/T band (color scheme of the book cover), flaps (width of flaps of the book cover), etc. are all consistent with the book you will keep in the bookshelf.

Finishing
Lastly, choose the most suitable finishing of your book. After you’ve settled on an acceptable weight for your paper, you need also consider its desired finish. Lamination is considered to be one of the most effective types of finishing.
Lamination is the process of attaching a clear plastic layer to printed materials in the printing industry. The most usual method is to adhere the film to all sides of the printed object, completely enclosing it in plastic. Lamination protects printed objects from stains, smudges, moisture, wrinkles, tears, and anything else that could limit their usable life. Print lamination provides strength and rigidity in addition to protection.
Gloss, matt, and silk laminates are the most common forms of laminate. Packaging, book covers, brochures, business cards, and other printed objects frequently employ lamination.
Ensure all the finishing processes like lamination and varnishing on the dummy are the same as your final copy.

Step 2 – Content Proofing
Content Proofing before printing would be the most time-consuming as each and every detail of your book needs your attention.
Small mistakes like typos and grammatical problems might mean the difference between a sale and a customer opting for the competition. According to research conducted by Standing Dog Interactive, only 3% of individuals don’t mind mistakes. At the same time, the majority consider typos and grammar issues to decide whether or not to continue reading.
When printing, it’s considerably more vital to catch problems. There’s no way to update your design in real-time once it’s in the hands of your readers. You can divide the content proofing into three broad categories.
Book Cover
After you are successful in finalizing the graphics of your book cover, proofread the content that is to be printed on it. Remember, the content on the book cover speaks for all the pages inside it. Thus, spend time carefully revising it.
The book cover title should follow the capitalization rule, and its spellings must be accurate. Next, cross-check the placing of the title, whether or not it satisfies the margin space, etc.
The cover image is the next priority. Even though the image file size is usually a decent quality indicator, the quality of a bitmap image is not influenced by the file size or even the image dimensions. DPI determines the level of quality (Dots per Inch). The number of dots per inch that make up an image’s colors and tones is referred to as DPI. It would be best to always aim for a high DPI count for whatever image you want to utilize in a print layout.
The next part is the logo. Revisit the placing, pixels, width, etc., of the logo that is to be printed on the book cover.
Finally, you cannot afford to make an error regarding the ISBN and barcode. Verify that the ISBN is correct and placing the ISBN barcode does not hinder the image or text on the cover.
Manuscript of the book
When you think you are all set with perfecting the outsides of the book, you can shift your attention to the content on the pages.
There are various techniques that can help you proofread the manuscript. Let us go through all the types that would get your book up in the bestseller tiles.
2.1 Linguistic proofreading
Linguistic proofreading entails reviewing for grammar errors, typos, spelling, and the entire flow of the language used in the advertisement, which most people identify with editing.
– Check the spellings of all the words in the document
– Make sure there are no grammar mistakes
– Ensure that the words are used in the correct context
You can use online tools to enhance the quality of linguistic proofreading. We find Grammarly, Hemingway editor, and smallseotools really helpful in getting our content up to the mark.
2.2 Prepress proofreading

Prepress proofreading (also known as graphic proofreading) is concerned with the text’s visual attractiveness. Look for word splitting at the end of line breaks, lines’ length, and even text spacing. The most important thing to remember when breaking sentences is to keep line lengths consistent. Longer or shorter lines stand out and, if not appropriately spaced, might detract from the overall uniformity of a block of text.
– Check for margins that are too small or too large
– Check for the text that is too close to the edge of the page
– Check for images that are too close to the edge of the page
– Verify if there are no unnecessary words in bold or italics
– Cross-check the word and line spacing that should ideally be the same throughout the book
– Verify the font (embedded or not) is of the perfect type and size
Being a professional printer with over 33 years in book printing business, Huaxin Printing has a team of experienced prepress engineers to make sure that all your files will be properly processed before printing. You can click here for more details about Huaxin’s prepress service.
2.3 Pagination
This proofing before printing method is used to check the numbering of the pages in the document. Traditional typographic processes such as altering your text’s leading, tracking, and kerning are critical to achieving the distinct look you want for your design. Consider your entire image to be a composition: each punctuation mark, word, block of negative space, and paragraph must work together to provide the viewer of your design a seamless experience.
– Make sure the page numbers are correct
– Check for duplicated page numbers
– Keep an eye out for missing page numbers
– Ensure that the content paginate accurately corresponds with the Table of Content (Index)
After checking the above pointers, you are all set to revise the copyright page.
-Vigilantly check the ISBN of the book
-Check if the data for the number of editions, the publisher’s name, the book’s title, and the author’s name are correct.
Images
Once you have checked the content that comprises the majority of your book, the next step is to pay attention to all the pictures you have used. Before printing, double-check the resolution of your photos. This includes not just the resolution of the photographs in your design but also the resolution at which you save the entire final document.
- Ensure that all the images you have used fit the context
- Check the size and resolution of all the images in the document (Any image you want to print must be a minimum of 300 DPI at 100% of its actual size.)
- Make sure all the images are correctly placed in the document
- Check for images that are too small or too large
- Make sure all the images are in CMYK color mode
- Verify that no image goes beyond the bleeding or cutting line
Note: You should never magnify photos beyond 20% of their original size. If you resize images in your document, the output resolution of the image changes.
Step 3 – Color Proofing
What you see on your computer screen is not always what you get from the printer when it comes to printing your design files. Checking the existing color mode of your design is one way to guarantee that what you see on your screen matches what comes out of the printer.
You might be familiar with the color processes RGB and CMYK.
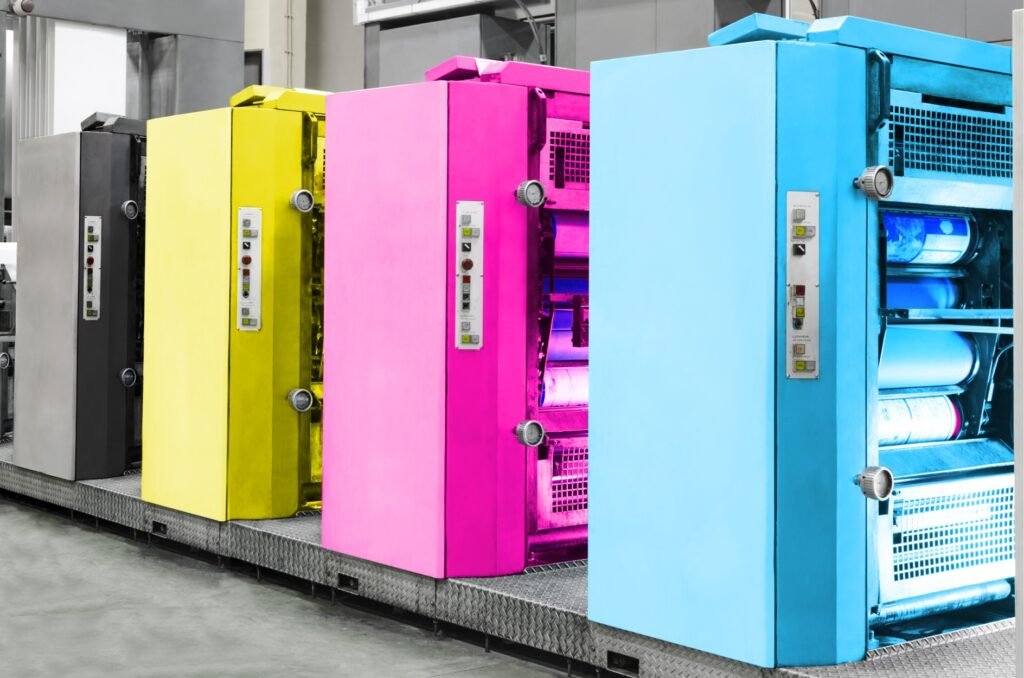
RGB is an additive technique, which means it combines red, green, and blue in various amounts to create additional colors. The CMYK process is a subtractive one. To create multiple colors, we can see different parts of cyan, magenta, yellow, and black are employed to “delete” reflected colors off the paper. The color palettes of the two methods differ, with RGB allowing a greater range of options.
Electronic equipment, such as computer monitors, uses RGB, whereas printing uses CMYK. Colors can appear muted when RGB is converted to CMYK. Designers were frequently dissatisfied when their printed items didn’t match what they saw on screen. Printers advised designers to change colors to CMYK so they could see them more appropriately on their computers.

Thus, long story short, your findings will not be accurate if your computer and printer do not communicate in the same color language. As a result, while color proofing, change your program to CMYK.
Okay, wait, don’t get puzzled by us throwing away some technical terms. If you are a non-professional print buyer, stick to the below-mentioned points for color proofing before printing, and you’ll be good to go.
- Ensure the images and colors are clean; there’s no non-erasable dirt or specks that should not have been in the file. If you find anything, double-check whether or not such unwanted elements are in the files with the printer.
- Also, proofreaders will send you a report of the out-of-gamut colors. If any colors are out-of-gamut, it means that those colors can not be accurately printed with the printing process, and you’ll have to make some changes.
- Make sure that the color registration is correct. Poor color registration causes visible color variation, duplication, and even ghosting of the images.
- Last but not least, check that black is really black, and all other colors appear as they should.
Professional print buyers, we have something for you as well!
Standard lighting

When the lighting changes, color seems different, which is why color evaluation requires regulated illumination. You may reduce waste, rejects, and rework while gaining an advantage over competitors by employing optimal lighting and best practices of visual assessment. When checking the colors, make sure that you are under the standard lighting, rather than a randomly selected lighting environment, which may cause variations in colors.
Read the color bar
Color is the lifeblood of the printing process. You’ll be well on your way to generating layouts with confidence if you have a rudimentary understanding of the key color guidelines for print.

Color bars are test targets used to assess print and proof quality. While it is possible to determine the color of the actual live image area, the equipment is costly, and thus, only a few printers are fortunate enough to have it. Furthermore, measuring the live image area does not provide nearly as much information as a color bar. As a result, color bars serve as proxies for the live image region while also providing additional data.
- With a meter: If you have the meter (for example, X-Rite), use the meter to read the color bars on the digital proof. X-Rite light booths offer essential color choices and reliable color assessment to minimize wasteful modifications. Visually evaluating objects and parts in a light booth – next to each other and under different light sources can assist in identifying product faults, color discrepancies, and other flaws.
- In the absence of a meter: If you do not have a meter, try to read the information above the color bar at the very least. Make sure the digital proof has the same color stand as your files.
Epson Proofing
Color proofing is done with a high-end proof, such as an Epson. Qualified printers should make sure that their Epson proofing equipment is compliant with ISO 12647, and actual press printing will adhere to the same color standard. With the help of this Epson proof, you can check for content, copy, spelling, pagination, cross-overs, and everything else that has to do with the final product’s appearance.
Please keep in mind that it is not printed on the same paper that the job is published on, and it is usually assembled by hand. As a result, crossovers may be a little off. However, certified printers will be able to follow the same color management standard as the Epson proof to ensure that the printed sheets precisely represent the colors by validating the colors.

As a professional printer with over 33 years in book printing business, Huaxin Printing is equipped with Epson proofing machine compliant with ISO 12647 standard. To further make sure that the colors on printed sheet are consistent with your confirmed proofs, we are also using the FOGRA standard and CIP-3 system for color managment on the printing presses. For more knowledge about how the entire color management is processed, click the link here for more details.
Lamination
Lamination is a printing finishing technique that involves applying pressure and heat to a thin layer of plastic called a laminate to paper or card. Lamination printing is commonly used to protect paper from regular wear and tear while also increasing the item’s durability. It comes in three different textures: gloss, matt, and velvet.

Even though lamination protects the book cover from constant wear and tear, it affects the color of the cover. The laminate, which is put immediately over the printed sheet, creates a change in the path of light hitting the sheet: initially directly on the printed sheet, then through the plastic film after lamination. Thus, the plastic film intensifies the ink’s color change in the light.
Furthermore, it’s possible that the color contrast and intensity will be reduced post lamination. The dot gain value is a factor that helps us comprehend the differences between a laminated and non-laminated printed sheet, and with lamination, this number rises dramatically. The dot gain is clearly optical rather than physical, owing to the film layer amplifying the visual sense of the dot dimensions. It’s almost as if the movie is a magnifying glass. As a result of this phenomenon, as dot gain grows, print contrast drops.
Hence it is very important to notify the printers that the colors on digital proofs should be consistent before or after lamination.
Step 4 – Packaging Proofing
Congratulations! You have successfully crossed the proofing before printing step off the list. Now, we can move ahead with packaging proofing so that the carton is as perfect as the book inside it.
The importance of proofing in package printing procedures cannot be overstated. An appropriate proof must meet three criteria: it must be quick, inexpensive, and color-accurate. The purpose here is to get the closest feasible match between the proof and the printing press, ensuring a predictable, reproducible printed outcome throughout the print run.
Carton Proofing
You might be wondering about how a carton proofing machine works?
The carton proofing machine has become a crucial piece of equipment in many enterprises. Professional software has processed all of the graphics in the carton-proofing machine’s actual work process. They carry out the actual carton proofing based on the graphics processing by this software. You can choose from a range of various cutting materials during the cutting process, depending on your demands. When the carton proofing machine is in operation, some dimensions will be marked on it, and a variety of different files.

If possible, ask the printer to send you a sample carton they are going to use. Be it an offline model or an online file; the proof will be sent to you after the prepress team has reviewed your design. After the proof is authorized, you and your manufacturing partner come to an agreement. Then, you must carefully examine the proof to ensure that it fully fulfills your requirements. It’s also critical that you make decisions promptly because a day spent approving the proof is a day spent waiting for manufacturing to begin.
So, when designing your boxes, take in mind the actual issues that will be experienced during production, and be especially cautious when examining the proof.
If sending a sample is not very convenient for the manufacturer, you can at least specify the requirement of the carton.
You can specify the size of the carton to be used and the weight limit per carton. This will ensure that your printer will not use disqualified cartons which may cause damage to your books during transportation.
Carton Mark Proofing
Once you have finalized the size, shape, and weight limit per carton, the last step is to check the carton mark proofing before printing. Carton marks can be either printed on the carton or attached to the carton using labels. You can decide whichever way you find more appropriate and communicate it to the manufacturer.
Also, ensure that you are vigilant while cross-checking the information on the carton mark. For example, PO number, the item number, description of the item description, number of copies inside the carton, quality of the carton, bar code, carton weight, and so on.
Lastly, you can decide where the carton marks should be printed or labeled on the carton. If you have a carton with some graphics on it, you would be required to brainstorm on fitting these marks without disturbing the graphics.

Summary
You must now be well aware that proofing before printing is of utmost importance. We hope the article can help you weigh the pros and cons of each proofing technique and decide which one will give you the best results. Till then, we wish you the best for your print!
About Huaxin Printing
Huaxin Printing, with 33 years of experience in book printing, provides authors and publishers globally the professional advice and manufacturing service of paper selection, layout design, color printing, and bookbinding service. Our clients include Trusted Media Brands, Lonely Planet, Les Edition de Saxe, and most major art book publishers in China.